Introduction
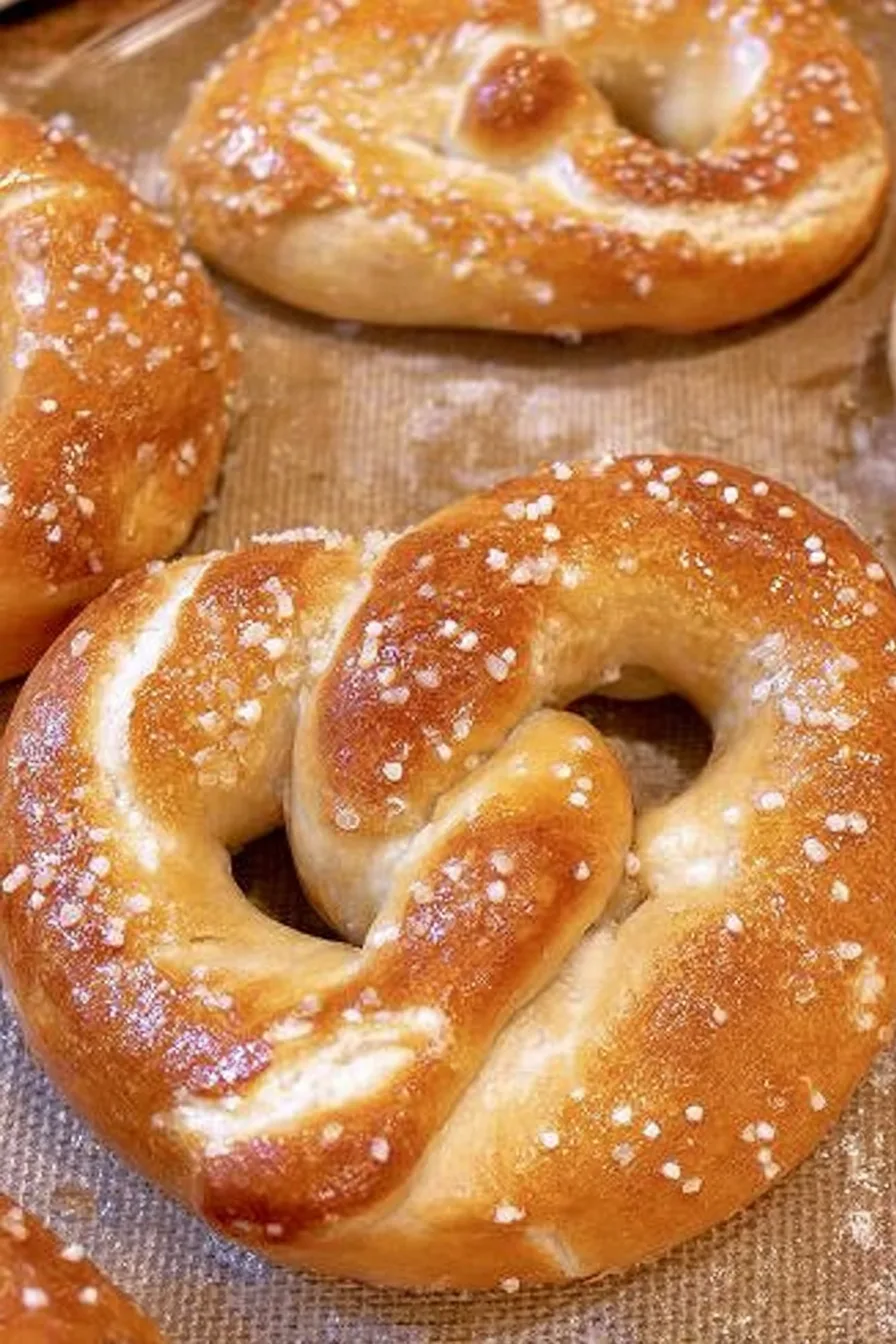
Welcome to the exciting world of making delicious homemade pretzels! Forget about disappointing store-bought versions and prepare for the irresistible aroma and incredible taste of freshly baked goodness. This easy-to-follow recipe guides you to create incredibly soft, wonderfully chewy, and perfectly golden brown pretzels right in your own kitchen. You can master these delightful treats in under 45 minutes, making them ideal for quick snacks, appetizers, or fun family baking activities. Perfect for beginners and seasoned bakers alike, get ready to enjoy classic, authentic pretzel flavor at home with surprising ease.
Table of Contents
Why You’ll Love These Homemade Pretzels
Get ready to fall in love with baking these delightful snacks!
- Super Easy & Quick Prep: This straightforward recipe simplifies the pretzel-making process, allowing you to enjoy fresh, warm pretzels without a long, complicated wait.
- Incredibly Soft & Chewy Texture: Achieve that perfect bakery-style bite with a tender, fluffy interior and a slightly crisp, flavorful exterior every single time.
- Authentic Traditional Flavor: Experience the classic, rich taste of a real pretzel, a true upgrade far superior to anything you can buy in a bag or from a frozen box.
- Highly Customizable: Easily switch between savory toppings like coarse salt or everything bagel seasoning, or opt for sweet options such as cinnamon sugar.
- Fun for All Ages: Baking these homemade pretzels is a rewarding and engaging activity that everyone in the family can enjoy participating in, from shaping to tasting.
- Significantly Better Than Store-Bought: Freshly baked, warm pretzels simply cannot be beaten for their superior flavor, incredible texture, and the satisfying feeling of creating them yourself.
Ingredients
Crafting the perfect batch of homemade pretzels starts with a few simple, accessible ingredients. You likely have most of these essential staples already in your pantry, making this recipe incredibly convenient. Each component plays a crucial role in achieving that signature chewy texture, rich flavor, and beautiful golden-brown finish that defines excellent soft pretzels.
- 2 and 1/4 teaspoons (7g) instant or active dry yeast (1 standard packet)
- 1 Tablespoon brown sugar or granulated sugar
- 1 and 1/2 cups (360ml) warm water (around 100°F/38°C)
- 1 Tablespoon (14g) unsalted butter, melted and slightly cooled
- 1 teaspoon salt
- 3 and 3/4–4 cups (469–500g) all-purpose flour (spooned & leveled), plus more as needed
- Coarse salt, for topping
- 1/2 cup (120g) baking soda
- 9 cups (2.13L) water
Notes & Substitutions
You can use either instant or active dry yeast; instant yeast blends directly, while active dry yeast may benefit from a brief proofing period. For optimal dough development, King Arthur Baking Company offers a comprehensive guide on yeast activation temperatures. Always ensure your water temperature is precise for optimal yeast activation – it should feel warm but not hot to the touch. Melted butter enhances the dough’s richness and contributes to the soft interior of your soft pretzels. Measure flour by spooning it into a measuring cup and leveling it off with a straight edge for accuracy. Coarse salt is absolutely essential for topping, providing that iconic crunchy texture and authentic salty flavor.
Equipment
Gathering your tools before you begin ensures a smooth and enjoyable baking experience. You won’t need any highly specialized equipment to create truly delicious homemade pretzels; standard kitchen items will suffice.
- Large mixing bowl (or a stand mixer fitted with a dough hook for easier kneading)
- Wooden spoon (or dough hook)
- Liquid and dry measuring cups, plus measuring spoons for accuracy
- Large pot (a Dutch oven is highly recommended for the baking soda bath due to its heat retention)
- Slotted spatula for safely transferring pretzels from the bath
- 2 large baking sheets to accommodate your batch
- Parchment paper or silicone baking mats (silicone is highly recommended for non-stick baking)
- Pizza cutter or sharp knife for precise dough division.
Instructions for Perfect Homemade Pretzels
Get ready to transform simple ingredients into incredibly satisfying homemade pretzels. Follow these detailed steps carefully for the best possible results, ensuring a soft, chewy, and perfectly golden treat.
- Activate Yeast: In your mixing bowl, whisk the yeast and sugar into 1 and 1/2 cups of warm water. Cover the mixture and let it sit undisturbed for 1 minute. This crucial step allows the yeast to begin its activation process, creating a foamy surface.
- Combine Wet Ingredients: Whisk in the melted butter and 1 teaspoon of salt until well combined. Next, add 3 cups of all-purpose flour. Mix with a sturdy wooden spoon or attach a dough hook if you are using a stand mixer until the ingredients are just combined.
- Form Dough: Gradually incorporate 3/4 cup more flour, mixing until the dough becomes slightly tacky but pulls away cleanly from the sides of the bowl. If it still feels excessively sticky, add up to an additional 1/4 cup of flour, one tablespoon at a time, until you reach the correct, pliable consistency. Poke the dough with your finger—if it slowly bounces back, it is ready for kneading.
- Knead Dough: Continue kneading the dough in the mixer for an additional 3 to 5 full minutes, or knead it by hand on a lightly floured surface for the same duration. If the dough becomes too sticky during this process, lightly sprinkle 1 teaspoon of flour at a time on the dough or work surface. The goal is a soft, slightly tacky dough that passes the “windowpane test,” indicating proper gluten development for those wonderfully chewy soft pretzels.
- Rest Dough: Gently shape the kneaded dough into a smooth ball. Lightly cover it with a clean towel and allow it to rest for a convenient 10 to 30 minutes. You can use this brief resting period to prepare your baking soda bath and oven as instructed in later steps.
- Preheat Oven & Prep Sheets: Preheat your oven to a precise 400°F (204°C). Line 2 large baking sheets with either parchment paper or, preferably, silicone baking mats. Silicone mats are highly recommended for their superior non-stick properties. If you opt for parchment paper, lightly spray it with nonstick spray or grease it with butter to prevent sticking.
- Divide & Shape: Using a sharp knife or a pizza cutter, carefully cut the dough into approximately 75g sections; this is roughly 1/3 cup of dough per pretzel. Roll each individual dough section into a long, thin rope, aiming for about 20–22 inches in length. Form a circle with the rope, bringing the two ends together at the top. Twist the ends together once, then bring the twisted ends back down towards yourself and firmly press them onto the bottom of the circle to create the iconic pretzel shape.
- Baking Soda Bath: In a large pot, bring 9 cups of water and 1/2 cup of baking soda to a robust rolling boil. Carefully drop 1–2 shaped pretzels into the boiling water for precisely 20–30 seconds. Boiling for any longer than this recommended time can unfortunately impart a metallic taste to your pretzels. Using a slotted spatula, gently lift the pretzel out of the water, allowing as much excess water as possible to drip off, then place it onto your prepared baking sheet. Taste of Home highlights how a baking soda bath creates the distinctive color and chewy crust essential for perfect homemade pretzels. Repeat this process with the remaining pretzels, working in small batches.
- Bake: Generously sprinkle the tops of your unbaked pretzels with coarse salt. Bake for 12–15 minutes, or until they achieve a beautiful, deep dark golden-brown color, indicating they are perfectly cooked and ready.
- Serve: Remove the finished homemade pretzels from the oven. For the ultimate experience, serve them warm with your favorite dips. Remember to store any leftover pretzels properly as directed in the storage section to maintain their freshness.
Pro Tips & Troubleshooting
Achieve perfect results every time you bake with these valuable insights and solutions.
- Flour Wisely: Be cautious not to add too much flour during the kneading process; an excess can lead to dry, tough, and less enjoyable pretzels. The ideal dough should remain slightly tacky to the touch.
- Yeast Activation: Always confirm your water temperature is accurate, ideally around 100°F (38°C), for optimal yeast activity. Water that is too hot will kill the yeast, while water that is too cold will inhibit its activation.
- Baking Soda Bath is Key: Do not skip the essential baking soda bath. This crucial step is responsible for creating the authentic, wonderfully chewy crust and promoting that beautiful, deep golden-brown color on your finished soft pretzels.
- Boil Precisely: Boil your shaped pretzels for only the recommended 20-30 seconds. Over-boiling can result in an undesirable metallic taste and negatively affect the final texture of your soft pretzels.
- Thorough Kneading: Knead the dough thoroughly and completely to properly develop the gluten. This development ensures your homemade pretzels will have that desirable elasticity and satisfying chewiness everyone loves.
- Non-Stick Baking: Utilize silicone baking mats for superior non-stick performance; they work significantly better than parchment paper in preventing your delicious pretzels from sticking to the baking sheets.
- Consistent Shaping: Strive for consistent pretzel shaping and uniform rope thickness. This attention to detail will ensure all your pretzels bake evenly and achieve the same delightful texture.
Serving, Storage, & Variations
Enjoy your freshly baked soft pretzels in many delicious ways, and keep them fresh for longer!
Serving Suggestions
- Serve these warm, irresistible homemade pretzels immediately after baking, topped generously with coarse salt.
- Pair them with a rich, creamy, and spicy nacho cheese sauce for a truly classic snack experience.
- Offer sweet dipping options like honey mustard or a delightful sweet cream cheese spread for appealing flavor contrasts.
- Customize sweet versions by brushing with melted butter and sprinkling generously with a mix of cinnamon sugar instead of coarse salt.
Storage Instructions
- Store any leftover pretzels at room temperature in an airtight container for up to 3 days to maintain their freshness.
- To quickly reheat, microwave for a few seconds, or bake at 350°F (177°C) for about 5 minutes until warmed through.
- For the best texture, only salt the pretzels you plan to eat right away; unsalted pretzels store better.
Freezing Instructions
- Freeze fully baked, unsalted pretzels by wrapping them tightly in plastic wrap and then foil.
- You can also freeze unbaked dough balls or boiled, unsalted pretzels by flash-freezing on a tray before transferring to a freezer bag.
- Always add salt right before reheating from frozen or baking the frozen unbaked dough.
Delicious Variations
- Make delightful bite-sized pretzel nuggets by cutting dough ropes into smaller pieces before boiling.
- Shape the dough into savory pretzel knots for an elegant and easy-to-eat presentation.
- Incorporate finely diced jalapeño and shredded cheddar cheese directly into the dough for a spicy, cheesy twist.
- Create soft pretzel rolls, perfect for elevating your homemade sandwiches or burgers.
Nutrition
These delicious homemade pretzels offer a satisfying and hearty snack, perfect for any time of day. Nutritional values can naturally vary based on exact flour measurement, the amount of coarse salt used, and individual serving sizes. This information provides an approximate breakdown per pretzel, assuming a batch yields 12 servings.
| Nutrient | Amount Per Pretzel (approx.) |
|---|---|
| Calories | 210 kcal |
| Total Fat | 2g |
| Saturated Fat | 1g |
| Cholesterol | 3mg |
| Sodium | 300mg |
| Total Carbs | 42g |
| Dietary Fiber | 2g |
| Sugars | 2g |
| Protein | 6g |
Allergens: This recipe contains common allergens including wheat and dairy.
FAQ
Find quick and helpful answers to the most common questions about making perfect, soft, and chewy pretzels.
- Why is the baking soda bath necessary? The baking soda bath is absolutely crucial for creating the pretzels’ signature chewy crust and helps them achieve that beautiful, deep golden-brown color during the baking process.
- Can I use a different type of yeast? Yes, this recipe works perfectly with both instant and active dry yeast. If using active dry, proof it in the warm water with sugar for 5-10 minutes until it becomes nicely foamy before adding the other ingredients.
- What if my dough is too sticky or dry? If the dough is too sticky, gradually add flour one tablespoon at a time. If it feels too dry, add water one teaspoon at a time until it reaches a soft and slightly tacky consistency.
- Can I prepare the pretzels in advance? Yes, you can refrigerate the boiled, unsalted homemade pretzels for up to 24 hours before baking. This makes them ideal for entertaining or meal prep.
- What’s the best way to freeze homemade pretzels? For optimal freshness, freeze fully baked, unsalted pretzels wrapped tightly, or freeze boiled, unsalted pretzels on a tray before bagging. Always add salt right before reheating or baking from frozen.
- Are there sweet topping options? Absolutely! Instead of coarse salt, brush baked pretzels with melted butter and sprinkle generously with cinnamon sugar for a delightful sweet treat.
- What dips go well with pretzels? Classic options include spicy nacho cheese sauce, tangy honey mustard, or even a sweet cream cheese glaze for dessert-style pretzels.
Conclusion
Congratulations, you have now unlocked the secret to truly irresistible homemade pretzels! Embracing this easy, beginner-friendly recipe brings the genuine joy of freshly baked, incredibly soft, and wonderfully chewy treats right into your home. Forget about complicated techniques; these perfectly golden-brown delights are surprisingly simple to master and incredibly rewarding to share. We sincerely encourage you to try making these delicious pretzels today and experience the satisfaction for yourself. Please feel free to share your personal pretzel experiences and creative variations with us! Get ready to impress your family and friends with the amazing flavor and texture of your very own soft pretzels.
Perfect Homemade Pretzels: Soft, Chewy, and Easy to Make
Ingredients
Equipment
Method
- Whisk the yeast and sugar into warm water, then cover and allow to sit for 1 minute.
- Whisk in the melted butter and salt, then add 3 cups of flour and mix until combined. Gradually add more flour, up to 1/4 cup, until the dough is slightly tacky and pulls away from the sides of the bowl; the dough is ready if it bounces back when poked.
- Knead the dough for 3 to 5 minutes, either in a mixer or by hand, adding small amounts of flour if needed to keep it soft and slightly tacky. The dough is properly kneaded when it slowly bounces back when poked, or passes the windowpane test.
- Shape the kneaded dough into a ball, cover lightly with a towel, and allow it to rest for 10 to 30 minutes, during which you can prepare the water and baking soda solution for boiling.
- Preheat the oven to 400°F (204°C) and line two baking sheets with parchment paper or silicone baking mats, greasing parchment paper if used, then set aside.
- Using a sharp knife or pizza cutter, cut the dough into approximately 75g sections, which is about 1/3 cup of dough each.
- Roll each dough section into a 20–22-inch rope, then form a circle by bringing the ends together, twisting them, and pressing them down to create the pretzel shape.
- Bring baking soda and 9 cups of water to a boil in a large pot, then drop 1–2 pretzels into the boiling water for 20–30 seconds before lifting them out with a slotted spatula and placing them on the prepared baking sheet.
- Sprinkle the tops of the pretzels with coarse salt and bake for 12–15 minutes, or until they are dark golden brown.
- Remove the pretzels from the oven and serve them warm, optionally with a spicy nacho cheese sauce.
- Store leftover pretzels at room temperature for up to 3 days, and reheat them by microwaving for a few seconds or baking at 350°F (177°C) for 5 minutes.