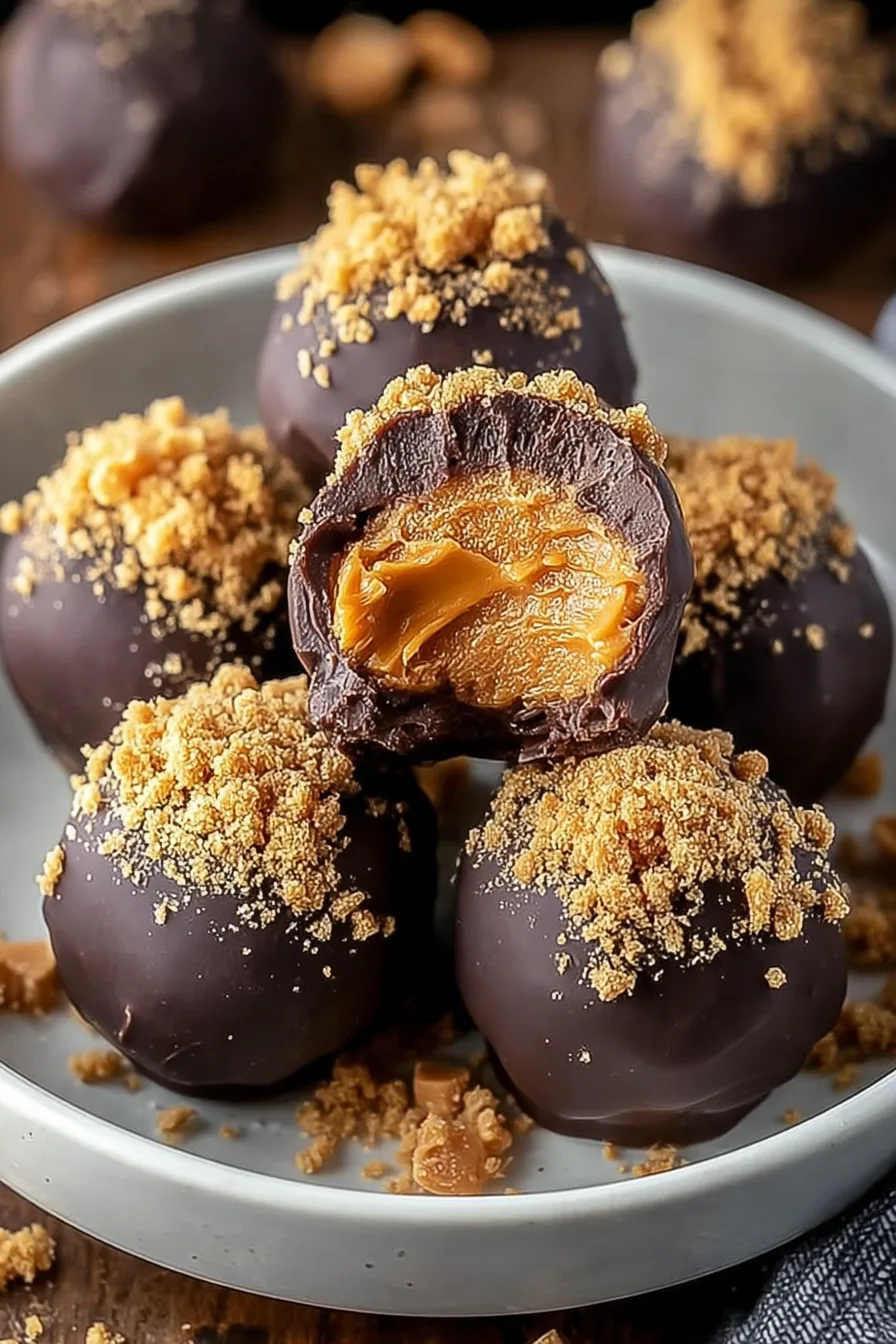
The holiday season brings a special kind of magic, filled with twinkling lights, cozy evenings, and, of course, irresistible treats. Imagine capturing all that joy in one bite! These Festive Butterfinger Balls are a delightful nod to holiday nostalgia, offering a perfect blend of sweet, crunchy, and absolutely delicious. This no-bake recipe makes creating these irresistible bites incredibly easy, ensuring you can whip up a batch quickly for any festive occasion. Get ready to impress everyone with their unique texture and amazing flavor.
Table of Contents
Why You’ll Love These Festive Butterfinger Balls
You will quickly discover why these treats become a holiday staple in your home. They are perfectly suited for any festive gathering, offering a simple yet elegant dessert option that always disappears fast. Since they are no-bake, you save valuable oven space during the busy holiday season, making preparation quick and stress-free. The unique combination of crushed Butterfinger candy bars and graham cracker crumbs creates an unforgettable texture that truly stands out.
These delightful balls are highly customizable; simply swap out Christmas sprinkles for other colors to match any occasion or theme. They are truly a crowd-pleaser, appealing to both kids and adults with their rich chocolate and peanut butter flavor profile. Beyond serving at home, these Festive Butterfinger Balls make ideal homemade gifts, packaged in decorative boxes or bags for friends, neighbors, and teachers.
Ingredients for Festive Butterfinger Balls
Gather these simple ingredients to create your batch of irresistible Festive Butterfinger Balls:
- Powdered sugar: 16 oz (about 3.5 cups), for sweetness and binding.
- Graham cracker crumbs: 2 cups, providing a delightful texture and base.
- Butterfinger bits: 1 package (found in the baking aisle) or 5 Butterfinger candy bars, crushed, for that signature crunchy peanut butter flavor.
- Unsalted butter: 1 1/4 cup, melted, to bring everything together smoothly.
- Creamy peanut butter: 1 1/2 cup, the essential binder and flavor backbone.
- Semi-sweet chocolate baking bars: 24 oz, for a rich, dippable coating.
- Christmas sprinkles: for festive decoration and a touch of holiday cheer.
Notes & Substitutions
You can easily adjust these treats to your taste preferences. While semi-sweet is classic, feel free to use milk chocolate for a sweeter coating or dark chocolate for a more intense flavor. For the peanut butter, creamy works best for a smooth dough, but if you enjoy more texture, a natural crunchy peanut butter can add a rustic feel. If Butterfinger is not available, try toffee bits, Heath bar pieces, or even crushed pretzels for a salty crunch. Beyond traditional Christmas sprinkles, explore other festive options like edible glitter, sanding sugar, or mini chocolate chips for decorating. If you do not have graham crackers, plain digestive biscuits or vanilla wafers work well as substitutes, just crush them finely.
Equipment You’ll Need
Making these no-bake treats requires minimal kitchen tools. You will need a large mixing bowl to combine your ingredients. A rubber spatula or sturdy spoon works best for mixing. Ensure you have measuring cups and spoons for accurate ingredient portions. For melting the chocolate, prepare a microwave-safe bowl or a double boiler setup. Parchment paper is essential for lining your baking sheet, preventing sticking. A fork or specialized dipping tools will help coat the balls evenly in chocolate. Finally, an air-tight container will keep your delicious treats fresh.
How to Make Festive Butterfinger Balls (Step-by-Step)
Crafting these delightful Festive Butterfinger Balls is a straightforward and enjoyable process. Follow these steps carefully for the best results.
- Combine Dry Ingredients Thoroughly: In a large mixing bowl, add the powdered sugar, graham cracker crumbs, and Butterfinger bits. Use a spatula or spoon to mix these dry components well, ensuring an even distribution of the Butterfinger crunch throughout.
- Add Melted Butter and Peanut Butter: Pour the melted butter directly into the bowl with the dry ingredients. Scoop in the creamy peanut butter next. These wet ingredients will act as the primary binders for your dough.
- Mix Until Well Combined: Stir everything vigorously until all ingredients are fully incorporated. The mixture should form a thick, uniform dough that pulls away from the sides of the bowl. Make sure there are no dry spots.
- Refrigerate Mixture for 30 Minutes: Cover the bowl with plastic wrap and place it in the refrigerator. Chilling the dough for about 30 minutes makes it firmer and much easier to roll into neat balls. Do not skip this important step.
- Prepare Chocolate Coating Per Instructions: While the dough chills, melt the semi-sweet chocolate baking bars. Follow the package instructions for melting, typically using a microwave in short intervals, stirring frequently, or a double boiler to prevent burning. Ensure the chocolate is smooth and lump-free.
- Roll Mixture into 1-inch Balls: Remove the chilled dough from the refrigerator. Take small portions of the mixture and roll them between your palms to form uniform 1-inch balls. Aim for consistency in size for even coating and presentation. You should yield about three dozen or more balls.
- Dip Each Ball in Melted Chocolate: Using a fork or a dipping tool, carefully submerge each ball into the melted chocolate. Swirl gently to ensure it is completely covered. Lift the ball, allowing any excess chocolate to drip back into the bowl.
- Place on Parchment-Lined Sheet: Gently place each chocolate-covered ball onto a baking sheet lined with parchment paper. This prevents sticking and makes for easy removal once the chocolate sets.
- Immediately Top with Festive Sprinkles: As soon as you place a ball on the parchment paper, generously sprinkle it with your chosen Christmas sprinkles. The chocolate sets quickly, so work efficiently to ensure the sprinkles adhere properly.
- Allow Chocolate to Harden Fully: Let the coated balls sit at room temperature until the chocolate is completely set and firm to the touch. This can take an hour or two depending on your kitchen’s temperature.
- Optional: Speed Hardening in Fridge/Freezer: To expedite the setting process, you can carefully transfer the baking sheet to the refrigerator for 15-20 minutes or the freezer for 5-10 minutes. This helps the chocolate harden much faster, especially if you are in a hurry.
Pro Tips for Perfect Butterfinger Balls
Achieving professional-looking results for your Festive Butterfinger Balls is simpler than you think with these expert tips. Ensure your dough mixture is smooth and lump-free before rolling to get uniform balls. When melting chocolate, do it carefully in short bursts, stirring often, to prevent it from seizing or burning. Using a sturdy fork with narrow tines or a dedicated dipping tool makes submerging and lifting the balls much easier and less messy. After dipping, gently tap the fork against the side of the bowl to remove any excess chocolate, ensuring a neat coating. Work quickly once the chocolate is melted, as it can start to set, making dipping more challenging. Chilling the rolled balls for an extra 10-15 minutes before dipping creates a firmer base, reducing the chance of them falling apart in the warm chocolate. Finally, feel free to adjust the amount and type of sprinkles for your desired festive look, adding them immediately after dipping while the chocolate is still wet.
Serving, Storage, and Variations
Serve your Festive Butterfinger Balls chilled for the best texture and flavor. The cool temperature enhances the rich taste of the chocolate and peanut butter while maintaining the delightful crunch of the Butterfinger bits. Arrange them on a festive platter for an impressive holiday dessert.
To store, place the finished balls in an airtight container in the refrigerator. They will stay fresh and delicious for up to two weeks, perfect for making ahead. For longer storage, you can freeze them for up to three months. Simply thaw them in the refrigerator before serving.
Proper storage is crucial for no-bake desserts to maintain both quality and food safety. Keeping these treats at the right refrigerator temperature helps prevent spoilage, as highlighted by storage guidelines for perishable desserts.
Variations
Experiment with different chocolate coatings like creamy white chocolate for a striking contrast or rich dark chocolate for a more intense flavor profile. Instead of sprinkles, try rolling the dipped balls in finely crushed nuts, toasted coconut flakes, or even more crushed Butterfinger bits for an extra crunch. Incorporate other candy bar pieces into the dough, such as crushed Snickers or Heath bars, for unique flavor twists. For a more elegant presentation, drizzle contrasting melted chocolate over the set balls. You can also form the mixture into festive shapes using small cookie cutters before dipping for an extra special touch.
Nutrition Information
Please note that this nutrition information is an estimate and can vary based on specific ingredients and brands used. These Festive Butterfinger Balls are designed as a rich, indulgent treat perfect for holiday enjoyment, not a health food.
| Nutrient | Estimated Value (per ball) |
|---|---|
| Calories | 180-220 |
| Total Fat | 12-15g |
| Saturated Fat | 7-9g |
| Total Carbs | 18-22g |
| Sugars | 15-18g |
| Protein | 2-3g |
These values serve as a general guide, acknowledging that homemade recipes can have variable nutritional content. Enjoy these delicious treats in moderation as part of your holiday celebrations.
Frequently Asked Questions (FAQ)
Can I make these Festive Butterfinger Balls ahead of time?
Absolutely! These treats are perfect for making in advance. You can prepare them up to two weeks ahead and store them in an airtight container in the refrigerator until you are ready to serve.
Are these genuinely no-bake?
Yes, this recipe is entirely no-bake. You only need to melt the chocolate for dipping, which you can do using a microwave or a double boiler, avoiding the need for an oven.
What if my chocolate seizes?
If your chocolate becomes thick and grainy, it likely seized from contact with water or overheating. Unfortunately, seized chocolate is hard to recover, so it is best to start with a fresh batch, ensuring your melting tools are completely dry.
Can I use crunchy peanut butter?
You can use crunchy peanut butter, but be aware it will give your balls a more textured, less smooth dough. Creamy peanut butter yields a more consistent and easier-to-roll mixture.
How long do they take to set?
At room temperature, the chocolate coating will typically set in 1-2 hours. If you want to speed up the process, you can place the baking sheet in the refrigerator for 15-20 minutes, or the freezer for 5-10 minutes.
Conclusion
These Festive Butterfinger Balls are truly a holiday revelation, combining irresistible flavors with an effortless, no-bake preparation. You now have everything you need to create these delightful and crunchy treats that are sure to be the star of any holiday gathering. Their simplicity makes them accessible for even the newest home cooks, while their deliciousness guarantees everyone will ask for the recipe. Go ahead, gather your ingredients, and bring some extra sparkle and crunch to your festive season. We encourage you to try this recipe soon and share the joy of these fantastic holiday bites with loved ones.
Festive Butterfinger Balls: An Easy Holiday Treat
Ingredients
Equipment
Method
- Combine powdered sugar, Butterfinger pieces, peanut butter, melted butter, and graham cracker crumbs in a large bowl, then refrigerate for 30 minutes.
- While the mixture chills, melt the chocolate as directed on its package.
- Roll the chilled mixture into 1-inch balls, aiming for about 3 dozen. Dip each ball into melted chocolate using a fork, then place on a parchment-lined sheet and decorate with sprinkles.
- Allow the chocolate-covered balls to harden, speeding up the process by briefly refrigerating or freezing them before packaging.